


Wing - Ribs
We got the predicted 70° weather today, so it's prime time. I finished scratching the last 4 ribs, and did the degreasing, etching, priming thing. This was an incredible day for late January, but we always get a week of spring weather here in Texas this time of the year. I really feel sorry for my comrades to the north.
I have improved my procedure since the last time that I did some priming. The last piece was the rear spar assemblies, where I had a problem with half-dried parts sticking to the newspaper. This time, I got some chicken wire, just like several websites suggested, and this solved my problem. However, I did have another problem that was a real mess.
I had some plastic sheeting that I had previously used to protect against the overspray. I put down the plastic sheeting and layed the chicken wire on top of that. When I started spraying, the previously dried paint started coming loose from the plastic and blowing all over the place. So I used a leaf blower to try and blow away all of the loose flakes of paint. The paint went everywhere--what a mess! Finally, I picked-up all of the ribs, took the plastic outside, and used a broom to scrape off all of the old dried paint. I'm sure my neighbors appreciated that. I can't believe how cheap I am.
The moral of the story is to either throw away the old sheet of plastic, or make sure it is totally clean before using it again. If you are going to be cheap, don't be lazy. If you are going to be lazy, don't be cheap.
And yes, it did take me 7 hours to do this. Actually, I started at 10am and I finished around 8pm. However, I spent a lot of time sitting around for 15 minutes at a time, waiting for the paint to dry before shooting the next coat. It takes several coats to get good coverage. I really like this AFS Primer/Sealer because it really is a lot nicer on your lungs, but it does take a lot longer to dry than the SW 988. However, given the amount of parts that actually need to be primed, this is not that big a deal.
 | Here's a few ribs being etched. |
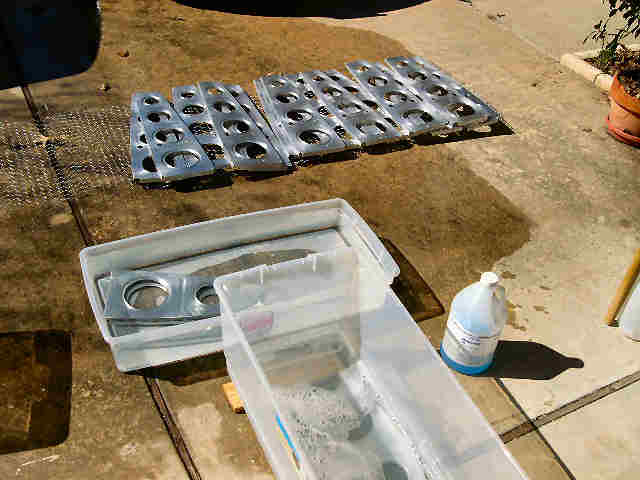 | This is my setup for degreasing, etching and drying. The first tub is the etch, and the second is the rinse. After rinsing, we need to let things dry on the chicken wire an hour before we can prime. |
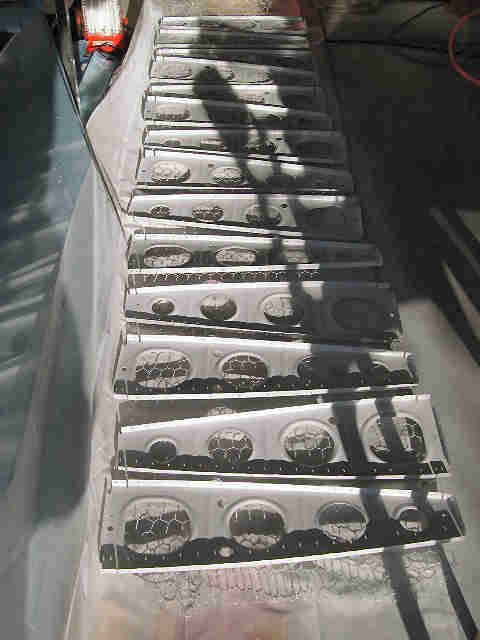 | This is a bad picture (I know, I seem to take a lot of bad pictures), but you can see the chicken wire that I am using to lay the ribs on. This got rid of the problem with half-dry ribs sticking to newspaper. This stuff is cheap, and it rolls-up nicely when you are done. |
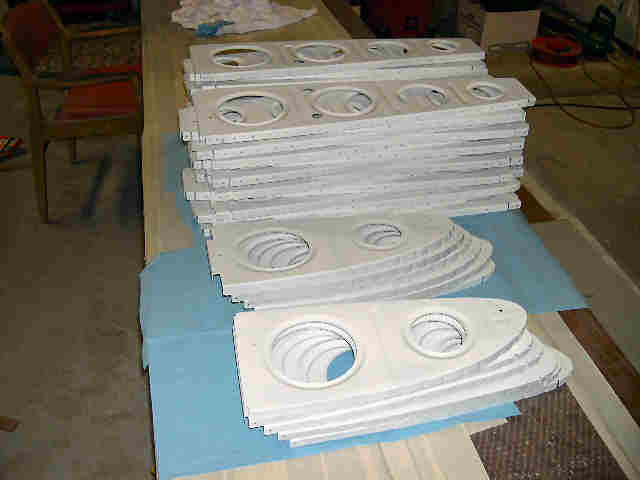 | Several piles of primed ribs. |