


I like to have an arm rest for my right arm, but the cockpit of the RV-7A is very tight. I am afraid that this might take up some of the already limited space. The only way to be sure is to actually build an arm rest and see how it feels.
|
Starting to think about the center console and arm rest. I am thinking about using two of Van's fuel valves, one for fuel in, and one for the return (the alternative is a $250 Andair dual valve). Obviously, there is not enough room for two fuel valves plus the manual trim, so a console would be useful. I thought the panel was forward of the spar, but it is almost straight above the spar. I need to think on this a little. |
|
The arm rest cannot come all the way forward, because the manual aileron trim has to go here. |
|
First go at a foam mock-up of the arm rest. The height is the same as the outside arm rest. This will work, because it is too hard to get to the manual aileron trim, plus it is a little high for comfort. |
|
That looks a little better. |
|
Need to add on the bottom piece so we fit over the F-??? tunnel cover. |
|
Need to add on another piece of foam so we can form a bottom flange that can be screwed to the center tunnel cover. We also need an extra piece at the back so we can have a tab that overlaps and screws into the center flap motor cover. That ought to just about do it for the arm rest form. Now to start laying up some fiberglass. |
|
I'm too lazy to make a plug and a mold, so I am using waxed paper to cover my foam before doing the first lay-up. |
|
Up to this point, I have been using scissors to cut the fiberglass. I bought this rotary cutter when I ordered all of my fiberglass materials, so I figured I had better give it a try. This thing really works. Perfect cuts, no tearing, and it is not that expensive, either. |
|
Cut the pieces to use and lay each piece between sheets of plastic, per Jim's recommendation. Note, I figured out that Saran Wrap, works, also, plus it's cheaper and easier to cut. |
|
Pull back the top layer of plastic, wet a piece of fiberglass, fold the plastic back over, then squeeze out the excess. Note, I figured out later that it is easier to just use a popscicle stick when wetting the fiberglass and it does not have to be squeezed out when you are done wetting the fiberglass (unless you are real sloppy). |
|
Right side, first lay-up. |
|
Left, front and top. First layer is done. |
|
Looks like I sanded all of the edges of the fiberglass, ready for the next layer. |
|
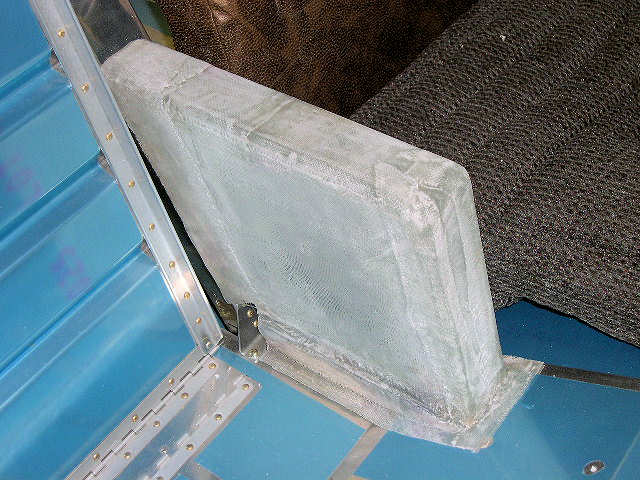
The fiberglass lifted off of the form without any problems. |
|
Well, no major problems, anyway. |
|
Seems to fit. |
|
I'm all out of my scrap pieces of fiberglass, time to break-out the new stuff, which seems to be quite a bit heavier. Nice diagonal pattern. |
|
Next layer done. |
|
Second layer filed and sanded. |
|
Looks like the tunnel cover fits ok. |
|
Match drill the arm rest to the tunnel cover. |
|
Fits, except that we cannot get to the FWD screw due to the angle. |
|
Next layer done. |
|
I used some microglass and epoxy to try and to fill-in the weave and some abnormal ripples in the part. Looks like I got it a little too thin. |
|
Sanded the filler down. Let's do one more coat. |
|
For the next layer of microglass and epoxy, I set the part 90° so it would not run down the side. To be honest here, I am going to cover the arm rest with headliner (fabric covered foam), so I am doing way more than I should. The part will not be visible, and no one will ever feel the weave through the foam. Also, this makes the part heavier for no good reason. |
|
Sanded the filler down, again. |
|
For the final coat of epoxy I used a brush (I have been using a popcicle stick and a squeegee). |
|
Time to cover this thing. Problem is, what's the best way to cut and fold the foam? We'll give this a try. |
|
Fold the foam over the top, now we have to close the front somehow. |
|
I decided to try and sew the foam in the front. The foam is real easy to sew. I thought it would not slide through the sewing machine, but I had no problem sewing it. Of course, I didn't such a good job, either. |
|
Fold the foam inside out, spray the foam, and the arm rest with 3M 77 contact cement, and see how it works out. |
|
Well, it could be better, but not that bad for a first try. I'll probably cut another piece later, and do it right, but that's ok for now. BTW, Happy Birthday to me, thanks. |